How do you create two aged wood signs, a burn-safe mirror, fake dead rabbits, a fake saw-blade, and fake splinters with almost no budget or experience? The answer is, a million trips to the dollar tree, all of your free time, and a lot of trial and error. This was my experience as art director of Mirror Lake. It was a struggle to create props that were safe, realistic and budget-friendly, but I really enjoyed the process and learned a lot along the way! Here is an account of how I made some of the film’s key props, and created some of the special effects.
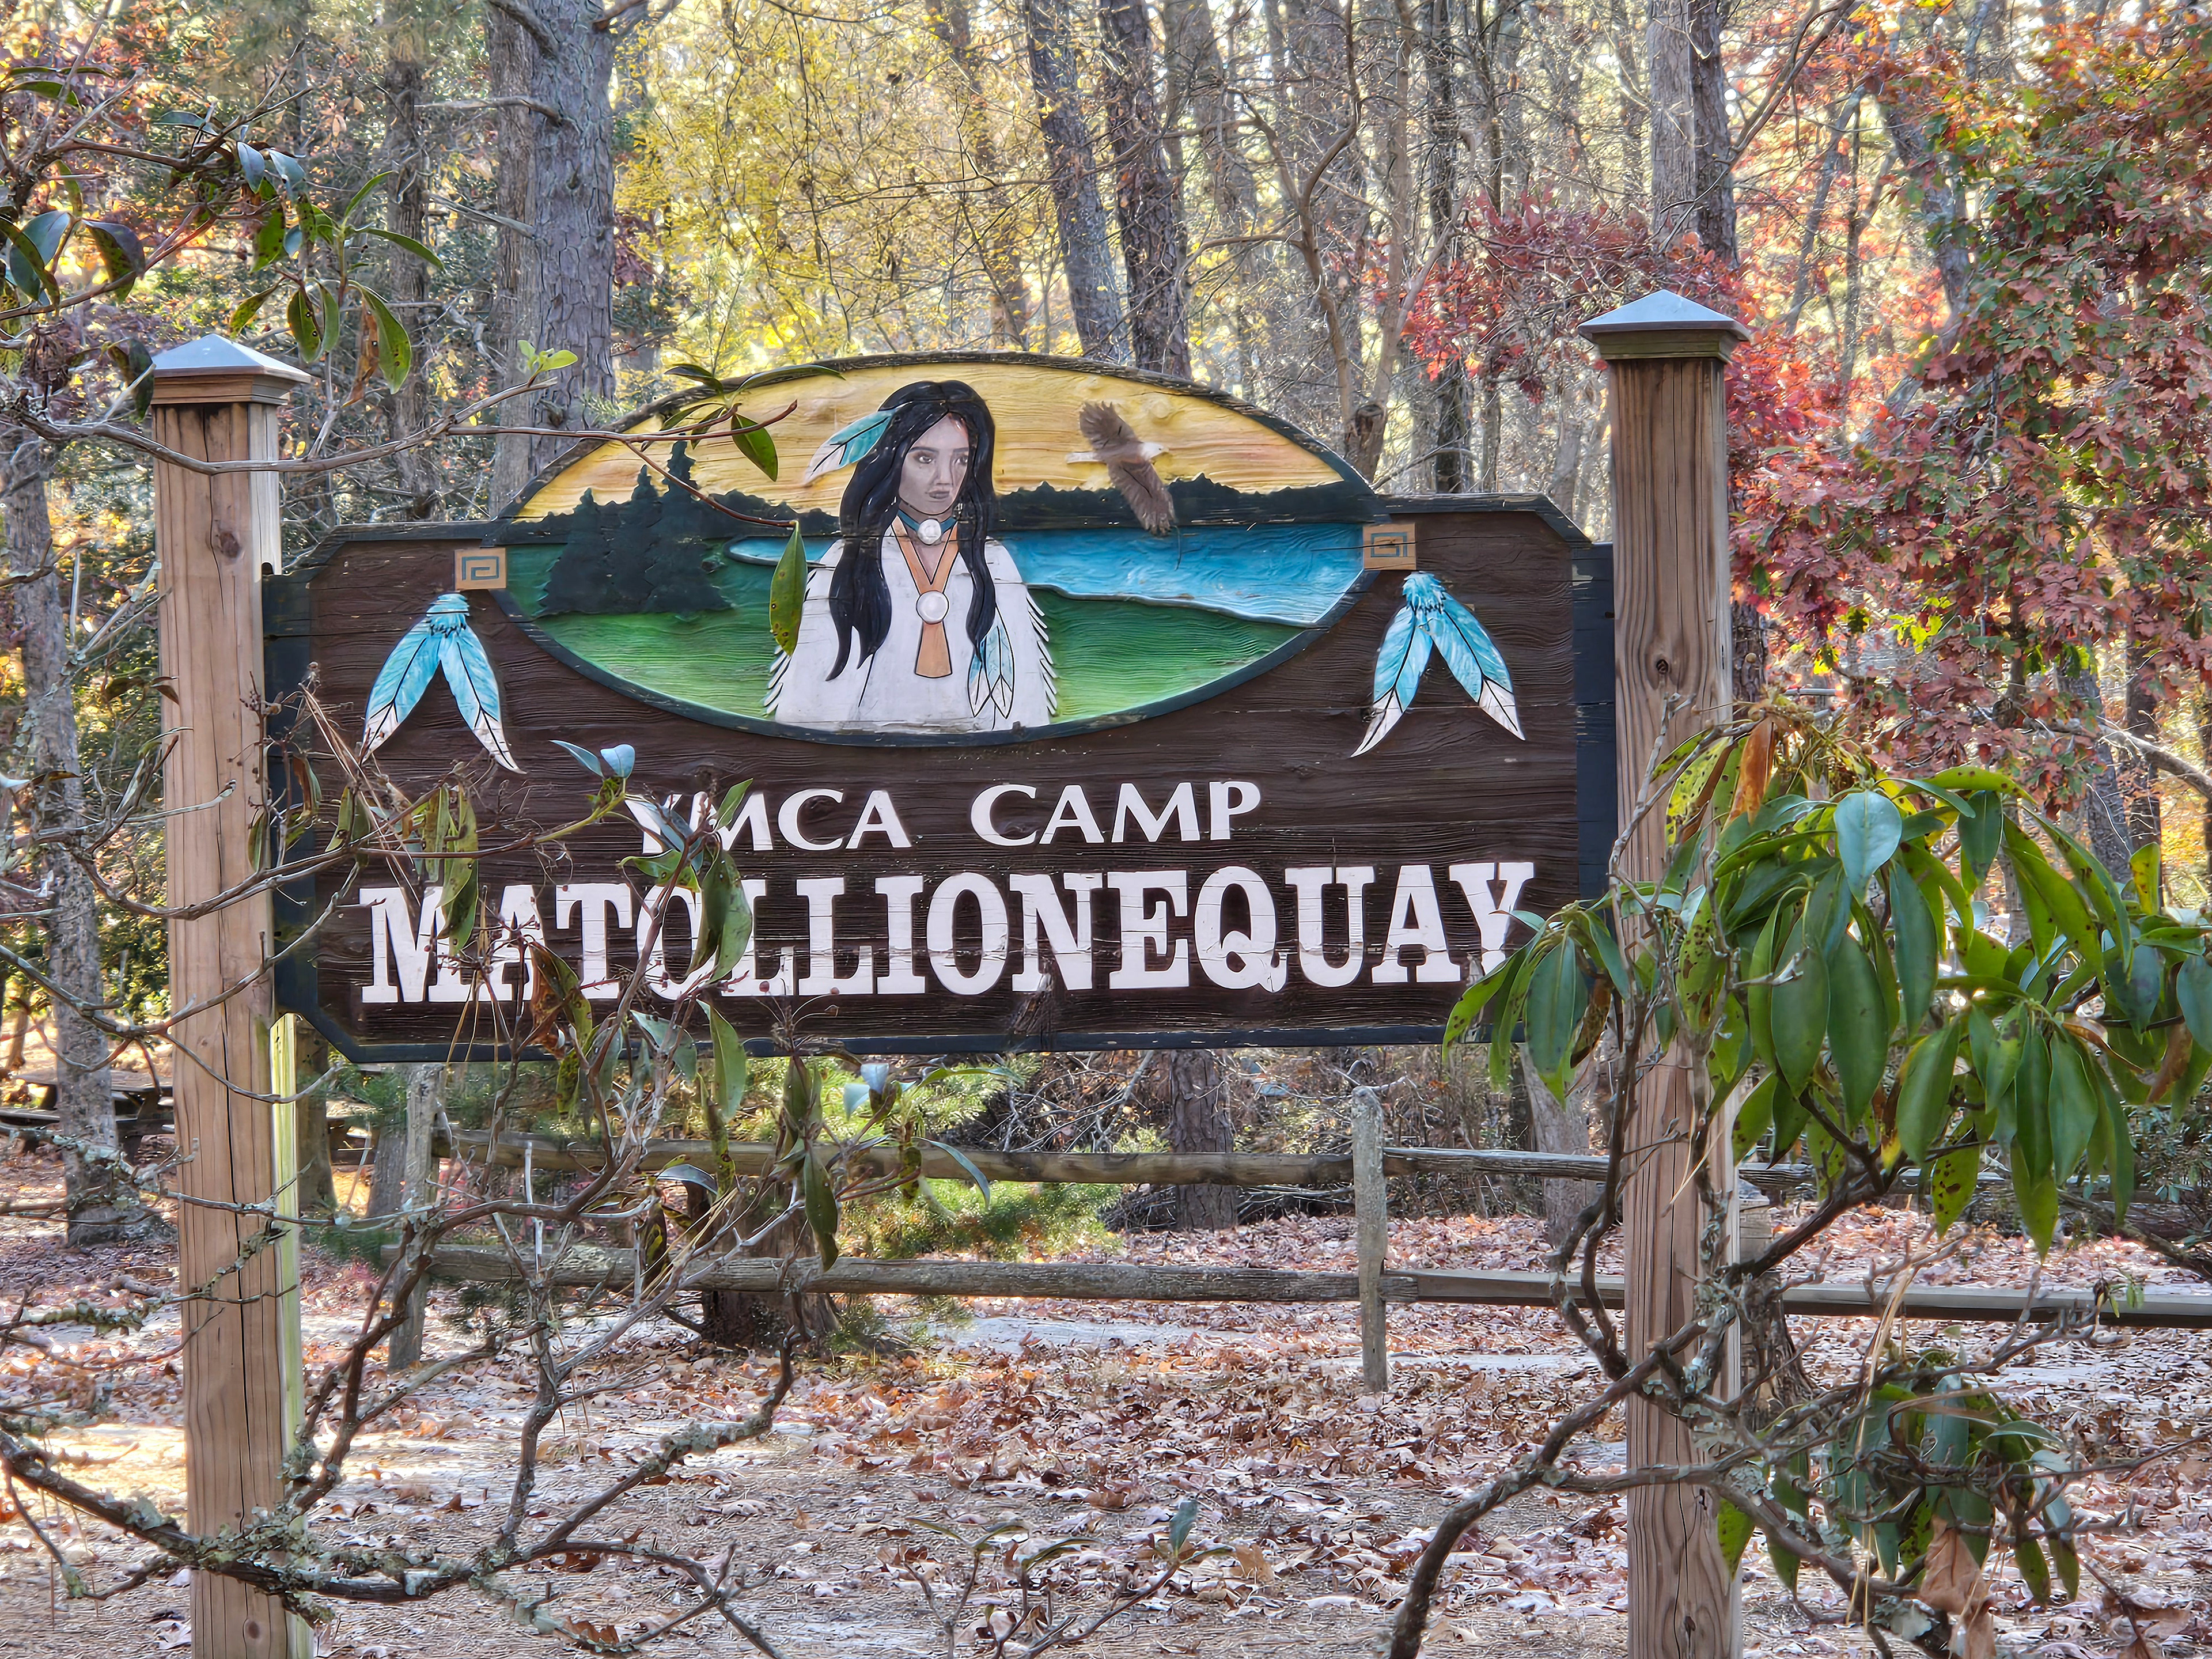
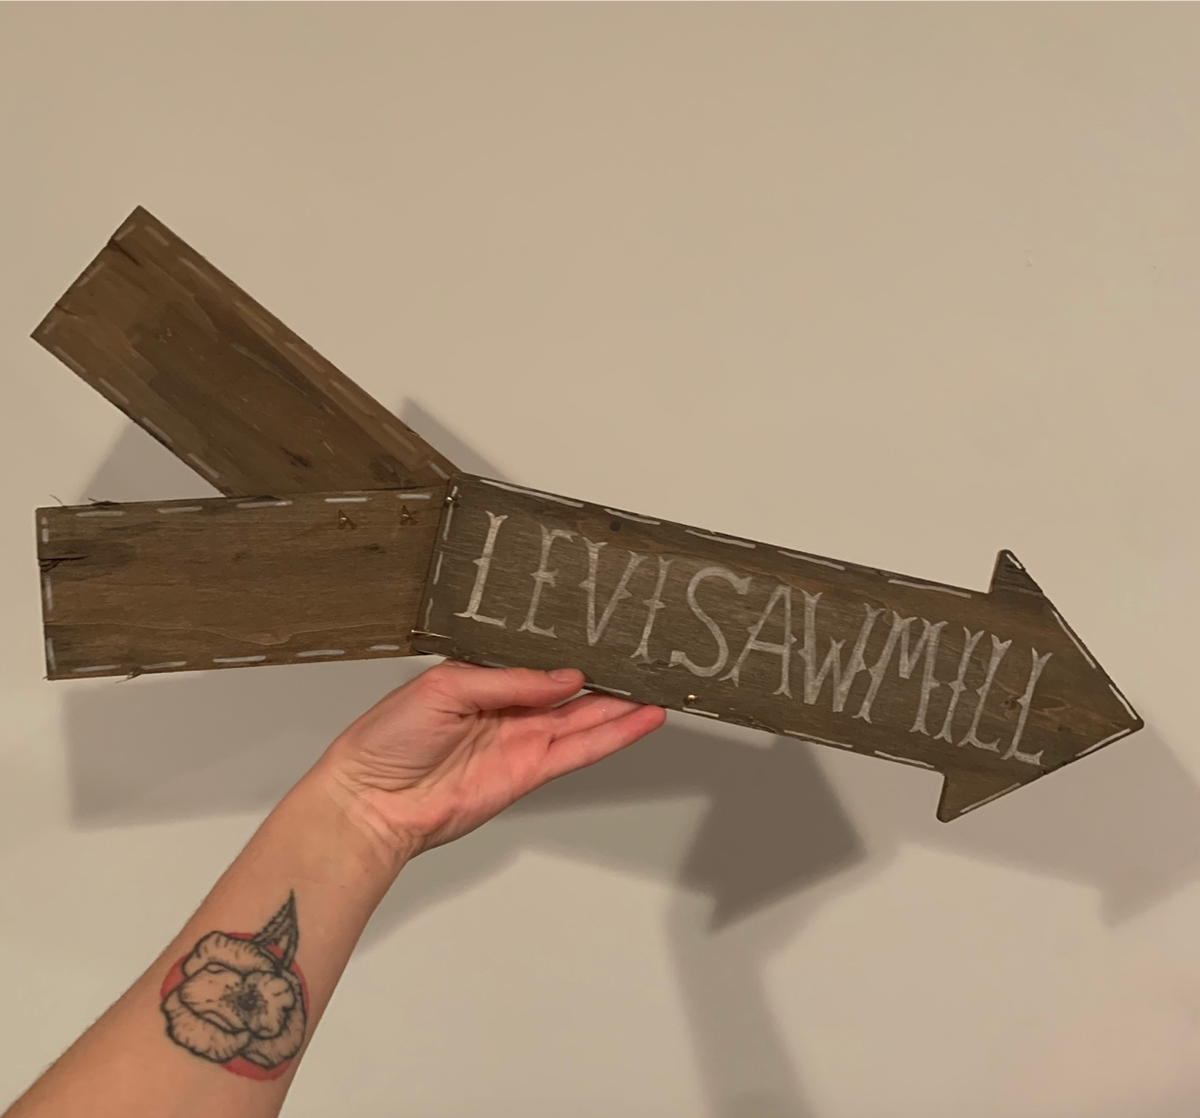
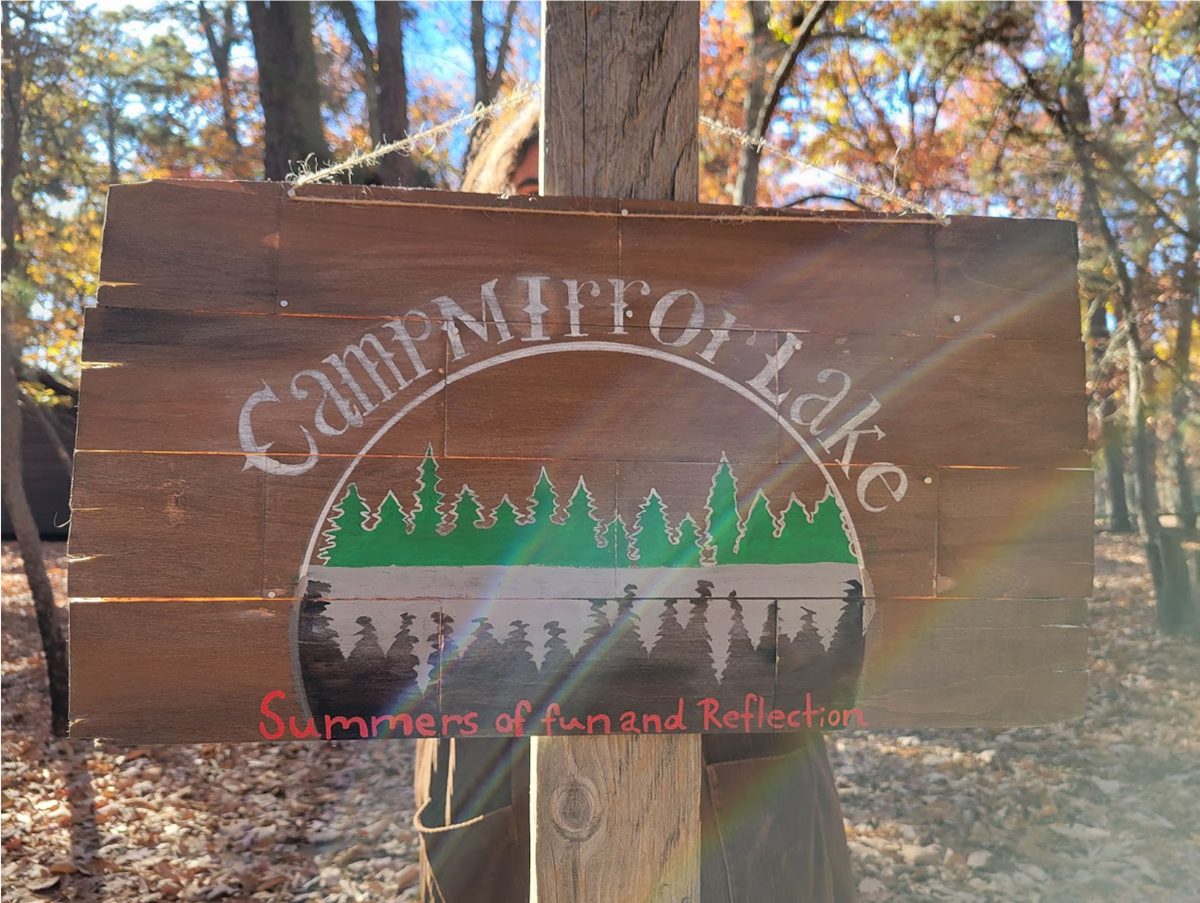
Props 1&2: Sawmill and Camp signs
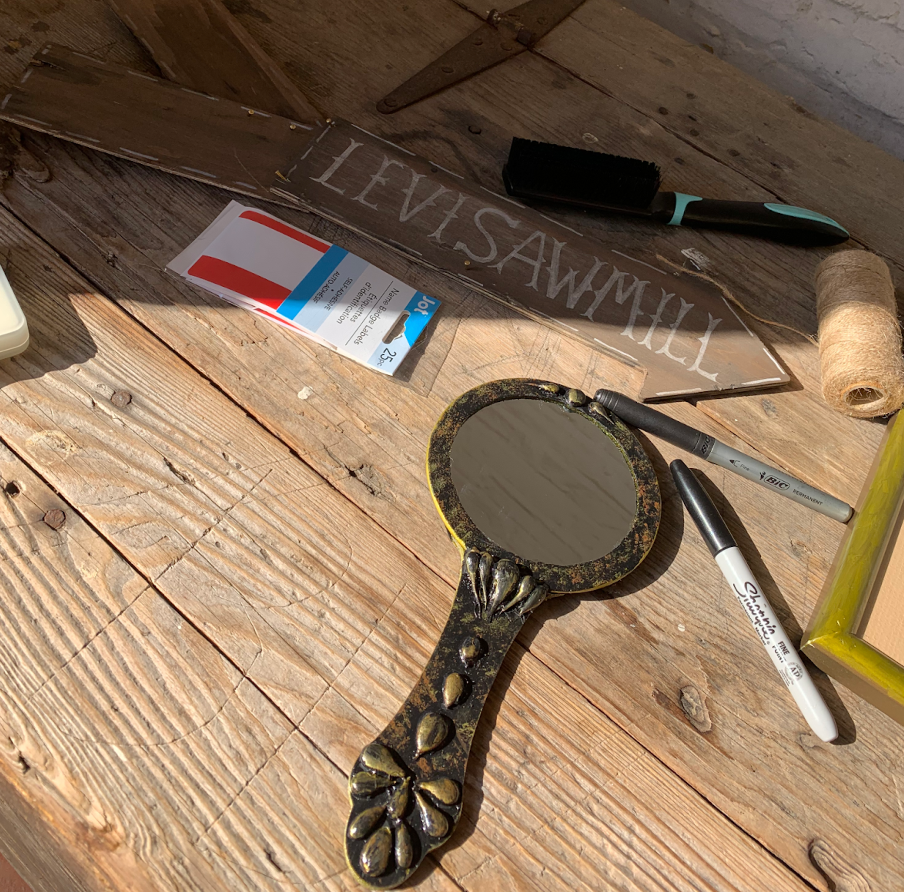
For the sawmill and camp signs, I knew that I needed to create signs that looked like aged wood, but were lightweight, easy to manipulate and cost effective. For this, I used MDF wood planks and shapes from the Dollar Tree. They were cheap, lightweight and cut-able, but made of real wood so they could be aged realistically.
I started by creating the color of the signs using a paint wash on the wooden pieces that I would need for the shape. For the sawmill sign, I used a wooden arrow as a base and two other wooden planks. For the camp sign, I used about 12 wooden planks, with two of them cut in half.
I used an acrylic paint wash, with about ¾ brown and ¼ black paint combined with water, and applied it in layers. The paint wash does not absorb very quickly into the wood, and goes on a lot darker than it dries. This required many layers which I let dry in between and adjusted the color and concentration of paint to water as I went. I imagine a real wood stain would work just as well for this, but I used what I had on hand, and I think that the opacity of the paint wash works well to create an aged look on the sign.
Next I used a bunch of different tools to ‘antique’ and rough up the sign pieces. I used a hammer to make dents and holes, wood carving tools to gouge out different areas, shears to split the wood in places and cut sections away. I used sandpaper to adjust the paint’s opacity and make it look more worn in some areas. I just played this process by ear until I felt it looked aged enough.
To assemble the signs, I used hot glue and small nails to attach the wood pieces. For the sawmill sign, I attached the two wooden planks on the end of the arrow to make the sign larger and more home-crafted. For the camp sign, I arranged the planks like bricks, staggering them in rows. The camp sign needed more structure, so I applied a thick layer of glue on its back once it was assembled, and applied a large sheet of paper over it to add more structure and stability.
For the camp sign, I used acrylic paint and stencils to create the lake and trees. The writing was completed in paint pen by my partner who has beautiful handwriting. After the designs were added, I went over them with sandpaper to create a more aged look.
Prop 3: Elizabeth’s Mirror
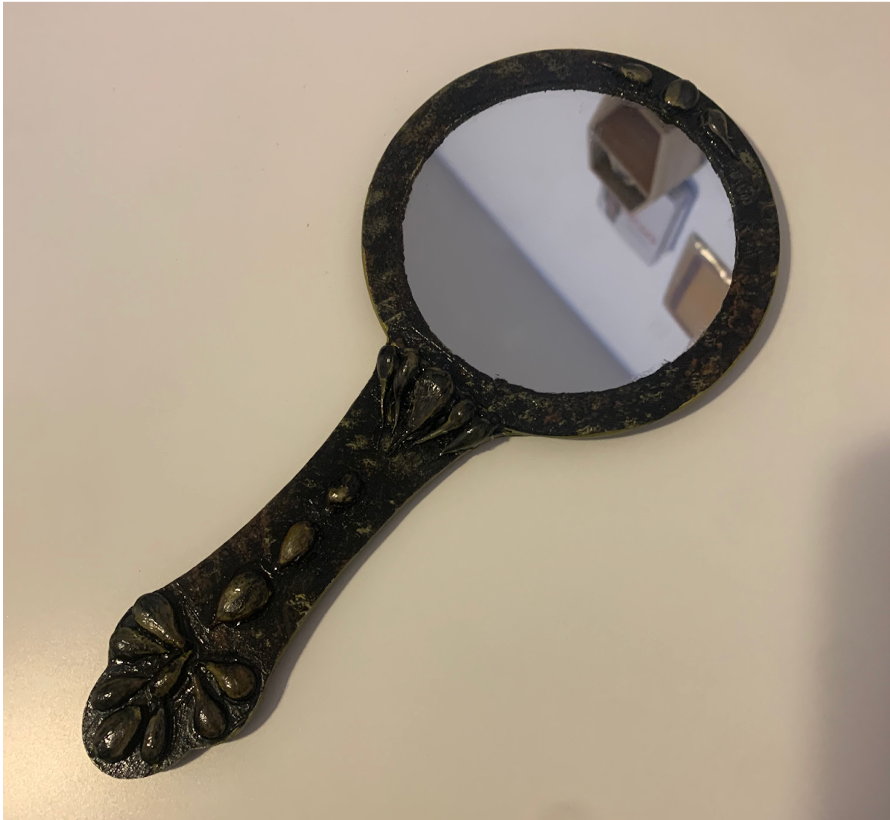
Elizabeth’s mirror was created using a dollar tree ‘mirror tray’, a dollar tree wooden cross, hot glue and paint. Could the cross that I used to make the mirror be the reason that it’s cursed? We may never know!
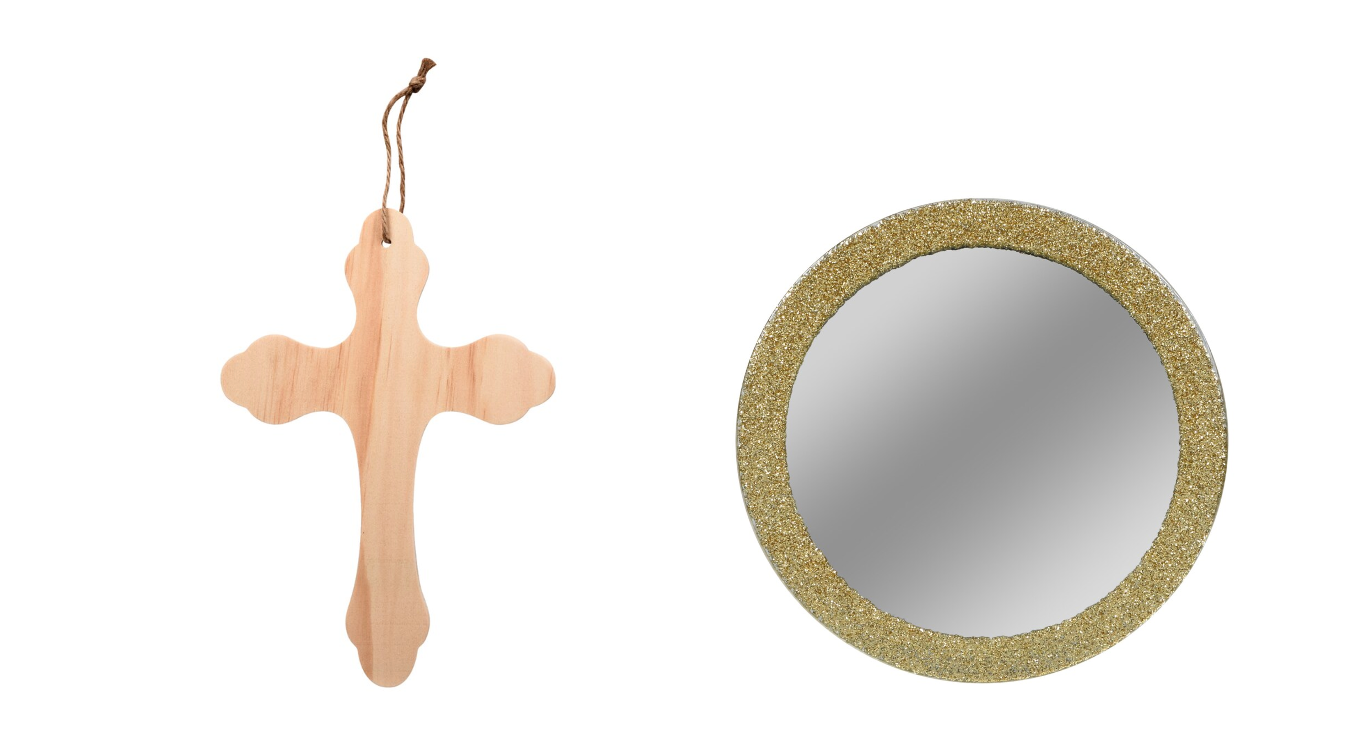
The dollar tree cross had a more detailed design, so I broke off the cross arms and used the long end as the handle of the mirror. I removed the feet from the mirror tray with a blade and attached it to the handle with hot glue. I reinforced and built up the joint between the mirror and the handle with hot glue to create a smooth transition. On the back of the mirror, I glued a piece of thick card over the joint between the mirror and handle to make it look like one smooth piece.
With the pieces attached, I added a few coats of black acrylic paint over everything, including the border of the mirror which had started out as gold glitter. Then, using my hot glue gun, I created many small embellishments of different shapes and sizes onto a glass plate. I selected the best ones by laying them on the mirror to try different layouts. Once I was happy with the result, I glued them down to create an ornate pattern, and then added black acrylic paint on top to blend everything together.
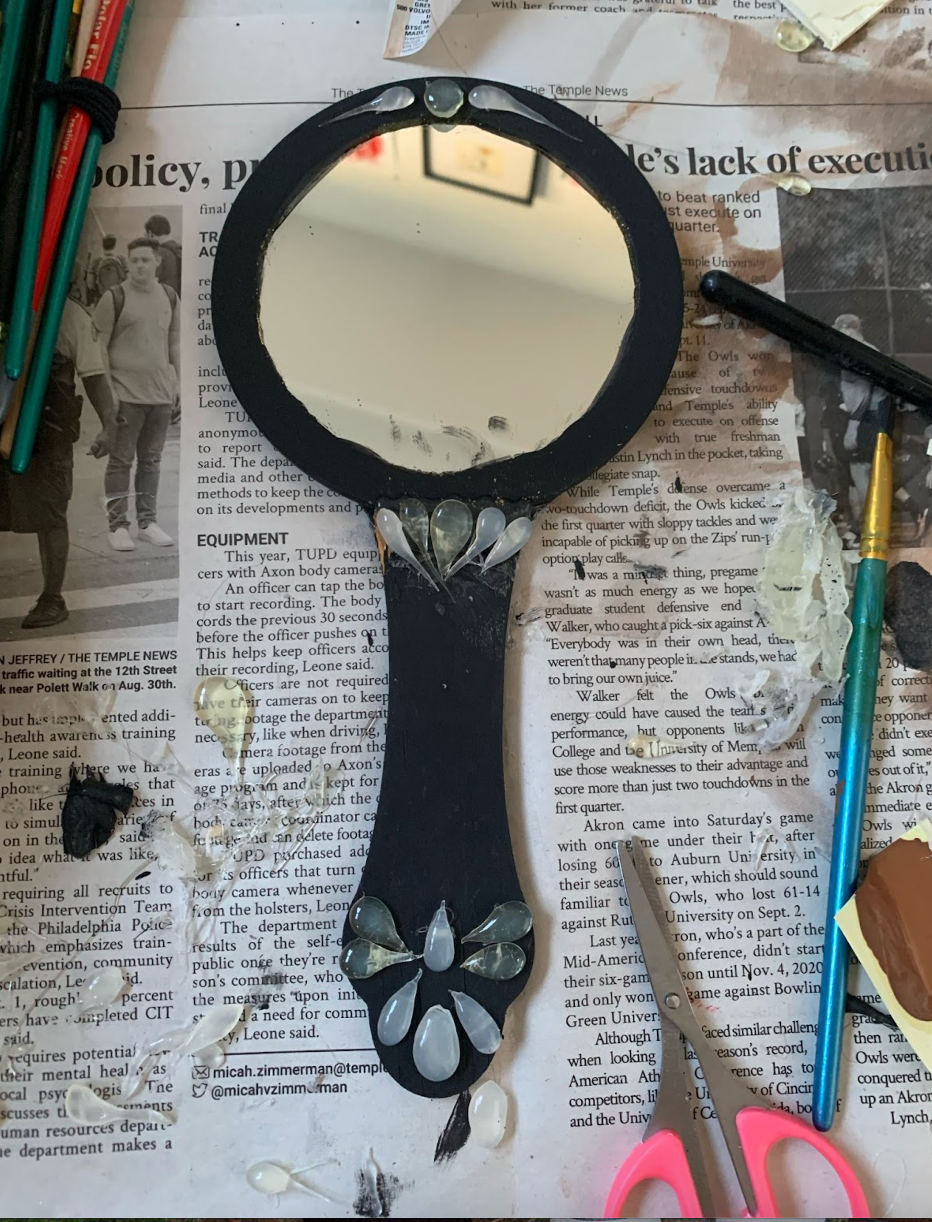
With everything covered in flat black paint, I found that the design wasn’t very visible. To add texture, I scrunched up a paper towel and dipped it in gold and brown paint and dabbed the surface of the mirror to create a stippled effect. On the hot glue embellishments, I covered them in gold paint, and then wiped it off after a second to leave some paint on the details but not create a solid color. I finished off the paint job with a clear glossy top coat, and scraped any extra paint off of the mirror surface.
The result was a mirror that looked old and ornate, but would be much safer and more effective to burn than a traditional hand mirror that is made of plastic or metal. This was a huge requirement since one of the final shots of the film would be Elizabeth’s mirror burning!
Prop 5: Sawblade
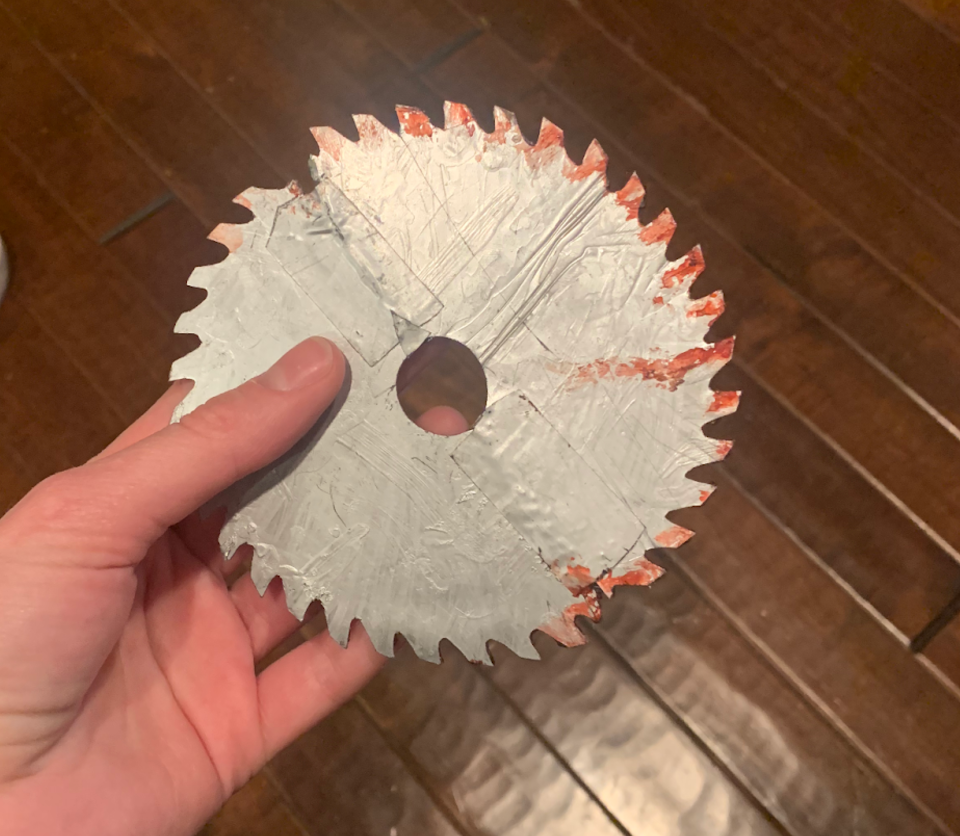
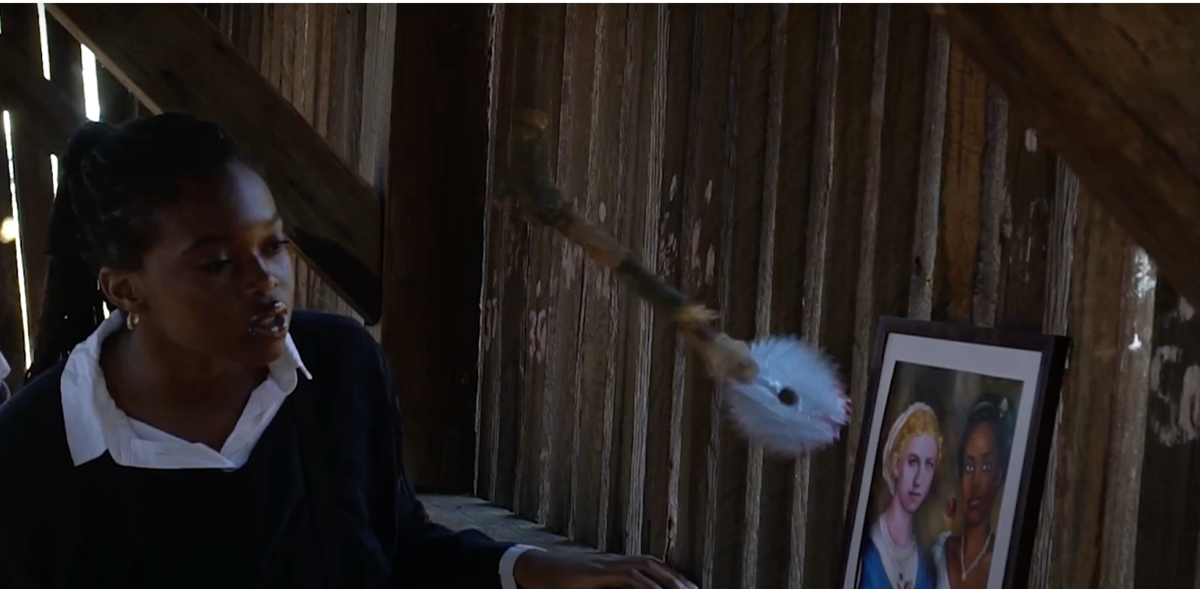
The fake saw blade took a lot of trial and error to create. Since it would be swinging towards our actresses and narrowly missing them, I needed to make sure it was lightweight and not dangerous. I played around with many different techniques and materials for creating something that was the right shape, size and color, but in the end my first idea ended up being the most effective. All I used was two sheets of shrink plastic (Shrinky-Dinks to be specific), a metallic silver paint, and some electrical tape.
First, I found an image online of a saw blade that I liked, (attached below) cropped it in half, and scaled it up to be the size of the 8.5x11 shrink plastic sheet. Next, I traced over the design on the sheet using my computer screen as a template. If you have a printer, it would be safer and easier to print out the design and trace it from there, but I just used what I had. I repeated this process on the second sheet of shrink plastic.

Next, I cut out the designs from the sheets and followed the instructions on the shrinky-dink plastic to shrink down the designs in the oven. Once they had cooled, I glued the two sawblade halves together, covered the joint in electrical tape to create a smoother surface, and painted everything with a silver metallic finish.
The finished product was a blade that had corners, but was no sharper than the edge of a notebook. It was lightweight, the correct shape, and looked pretty believable on camera!
Prop 6: Dead Rabbits
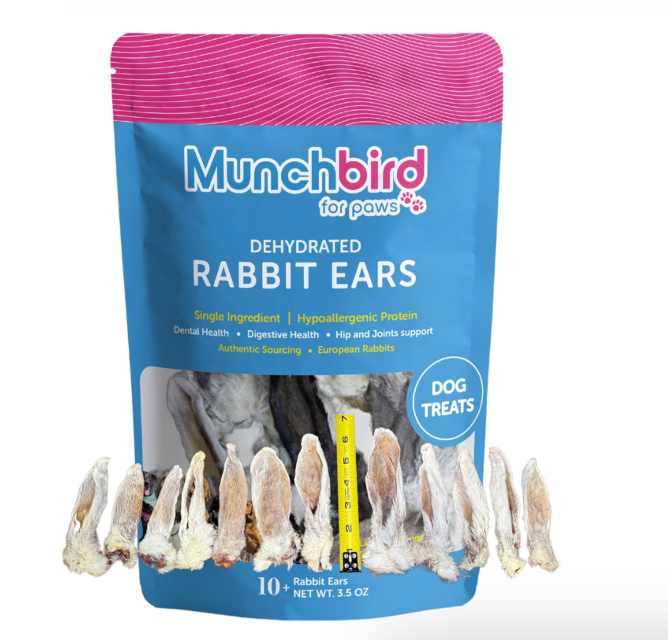
A huge challenge in production was creating realistic-looking fake dead rabbits for the shower reveal scene. It was far more difficult than I expected to find toy rabbits that had a realistic shape and size. The best source I found was a pet store, in the dog toy section. I picked up two realistically shaped rabbit dog toys (which were quite expensive at $20 each!) to act as the base for the dead rabbits. I also used a single real rabbit pelt, and a pack of dehydrated rabbit ears that still had fur on them (which were meant to be used as dog treats, thanks again to the pet store!) and fake blood.
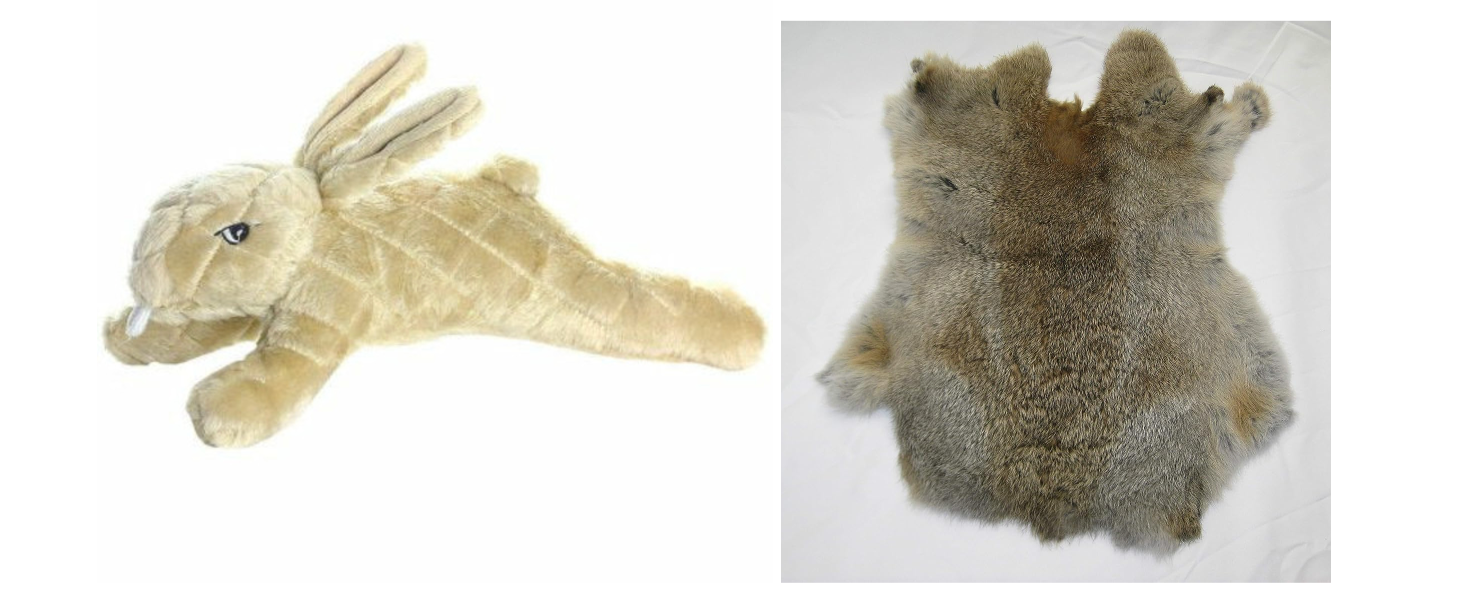
The first step in making the rabbits look realistic was to remove all of their stuffing, to make them look less stiff and more limp and lifeless. Next, I used a paint wash to add the correct coloring to their fabric. I did many layers, letting it dry in between, until I liked the color. Over the toy’s cartoony eyes, I applied layers of hot glue to create a 3D rounded almond eye shape, which I then colored with a black paint pen. I also cut off the felt rabbit teeth that were attached to their faces. I added back in some stuffing to the skins, adjusting based on what gave the best appearance and weight.
The biggest challenge was to take these rabbit toys, which had zig-zag stitching all over them and very short fur, and make them look real enough to scare the audience. The solution didn’t really come until we were fully setting up the shot on the day of filming. First, we layed out the rabbits on the shower stall floor, posing them in a way that looked most realistic. Then, my classmate Safiya and I cut sections out of the real rabbit pelt and laid them on top of the toy rabbits to piece together a realistic fur body, covering the unrealistic stitching. Finding that the dehydrated rabbit ears were more realistic than the ones on the toy, we cut off the fake ears and staged the real rabbit ears on the toy instead. Then, we added fake blood all around the bathroom stall and on the toy rabbits to create the effect we wanted (fake blood hides a multitude of sins!).
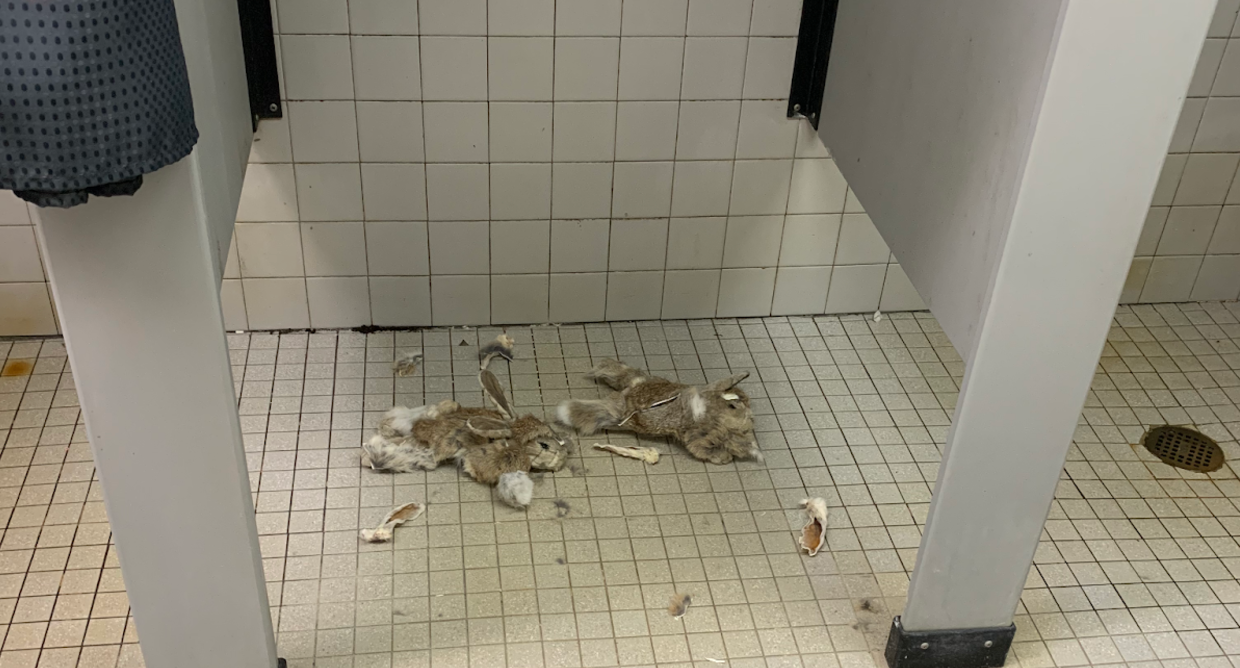
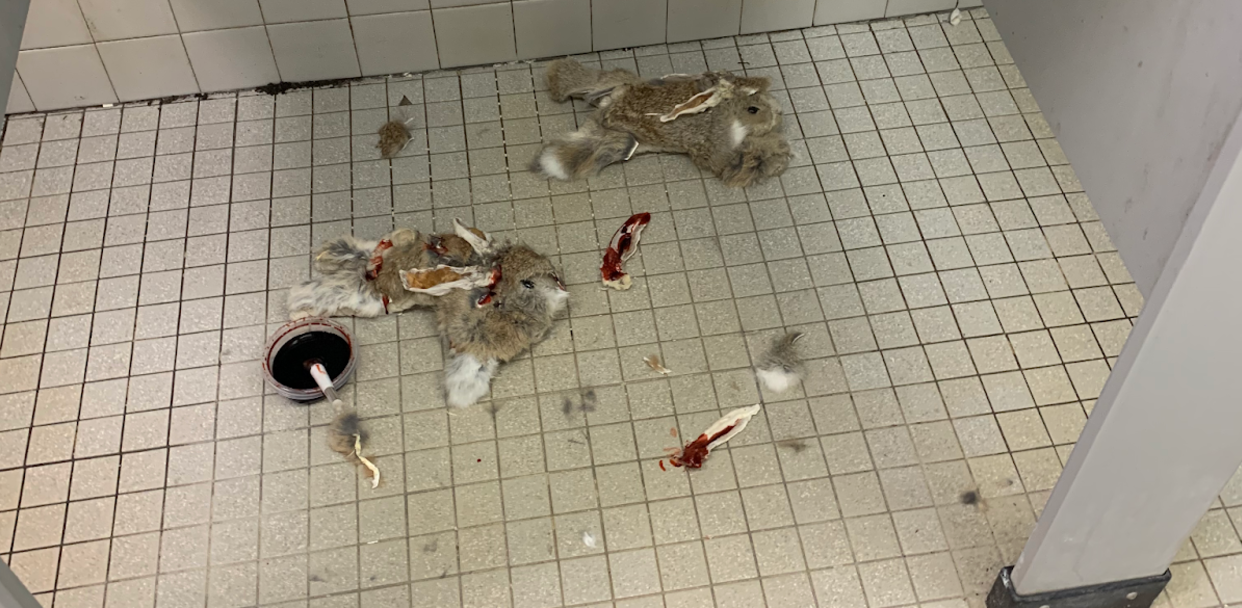
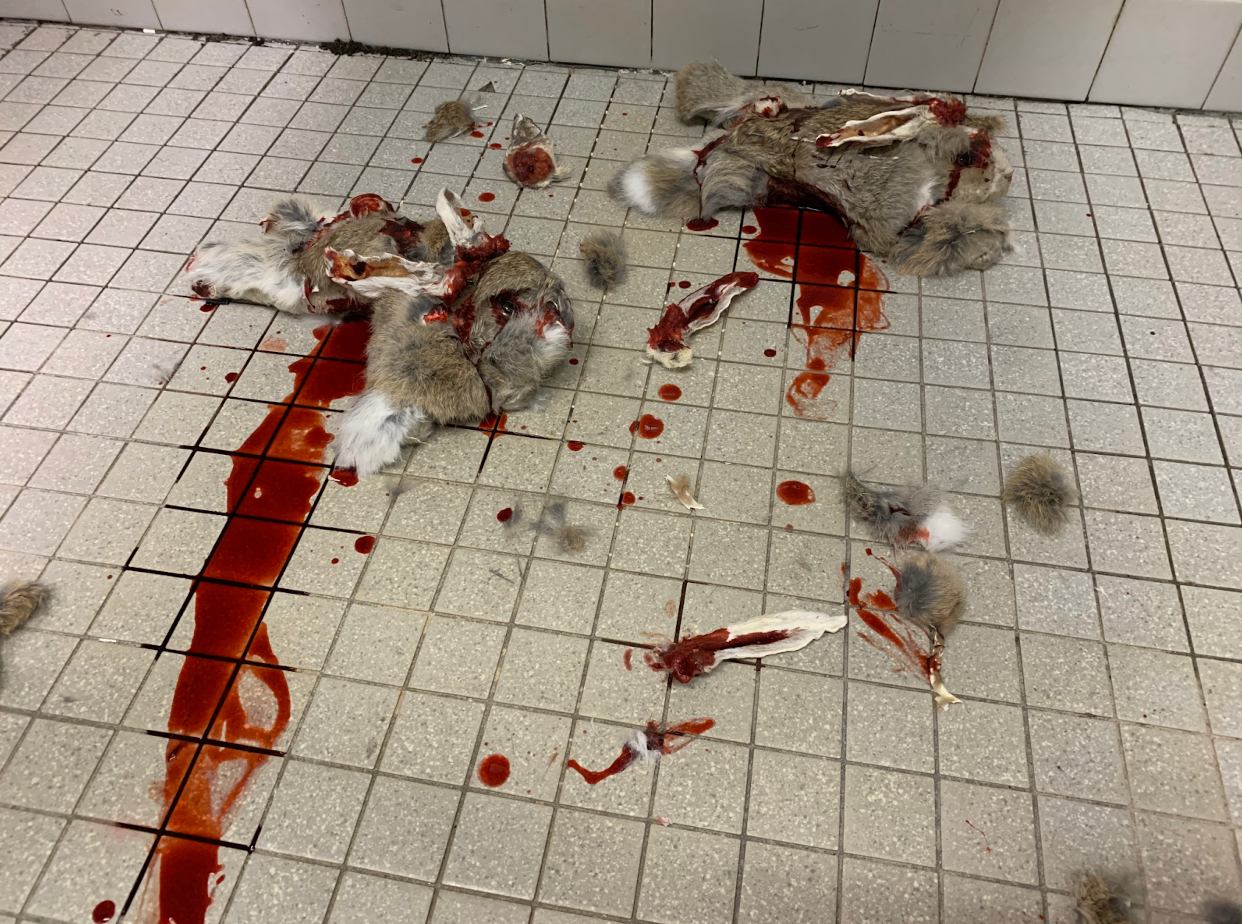
Although it was pieced together at the last minute and was a literal Franken-rabbit made of real rabbit parts and a toy base, the result was far more realistic than I could’ve imagined! I’m so happy with how this scene came out in the end. Thank you to the real rabbits who sacrificed their parts for this scene, and to Safiya for being willing to handle them and get stained with fake blood alongside me.
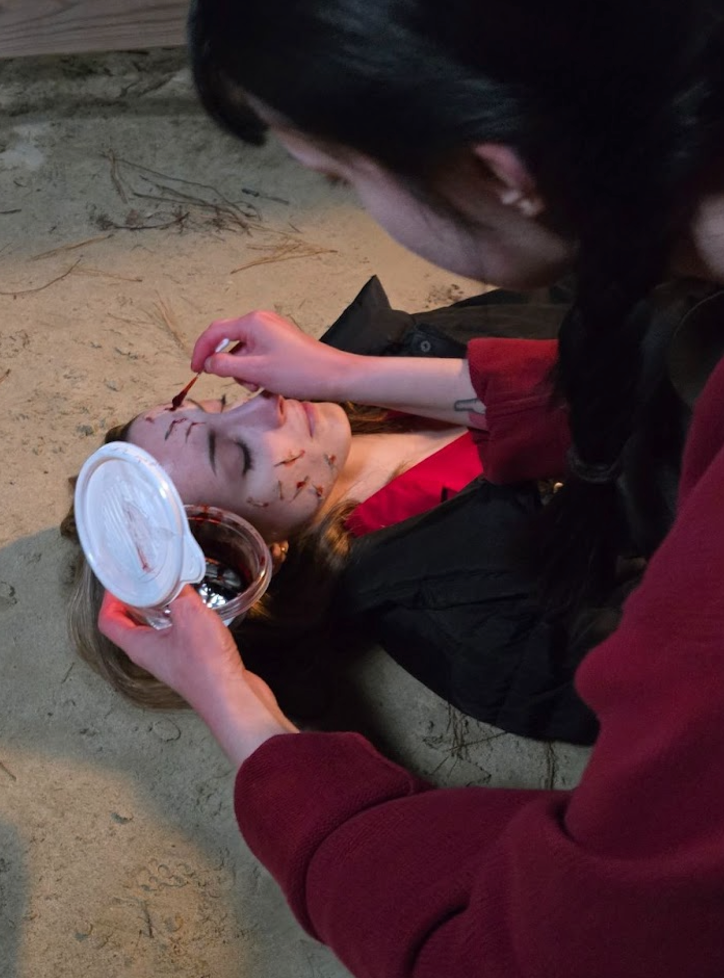
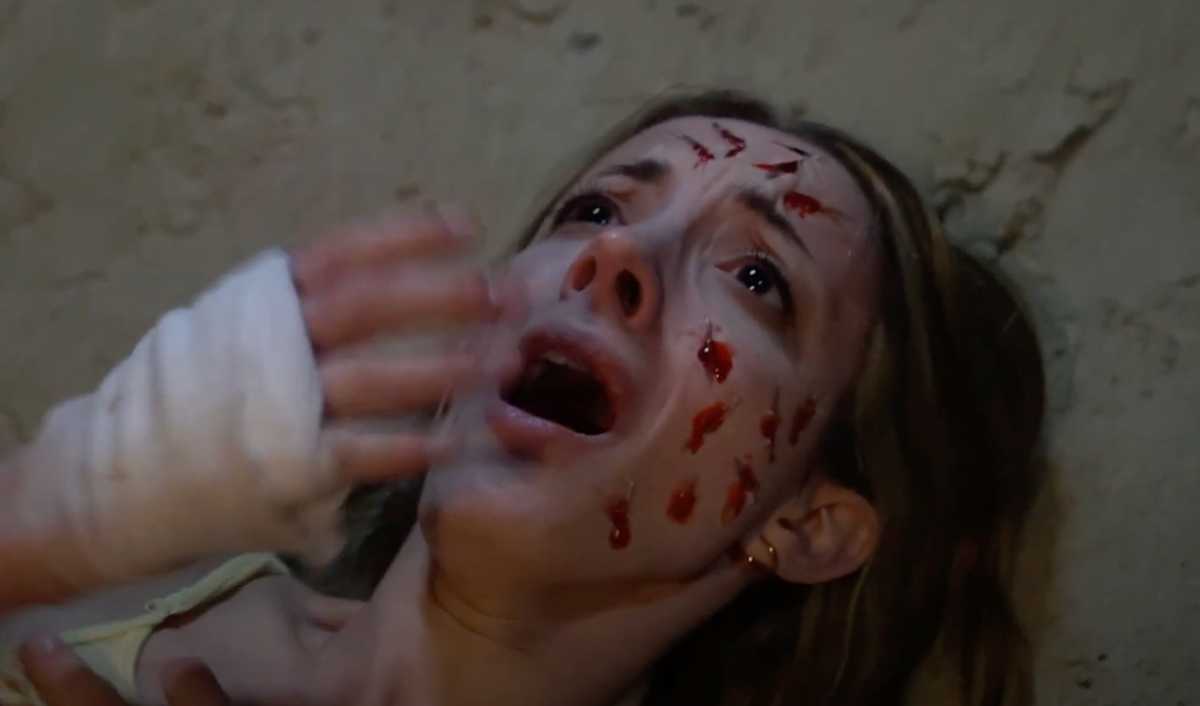
Splinter SFX Makeup
I didn’t have much experience with SFX makeup before Mirror Lake, but I had a lot of fun with it on this project. My main SFX makeup task was to create splinters, on one of the actresses hands and on her face. I bought a few different products from Spirit Halloween to try, so they probably weren’t the best quality. For the actual splinter wood, I used a combination of toothpicks painted black/brown, and slivers of wood from the dollar tree MDF planks that I cut down to size and painted. It took a lot of trial and error, but I figured out the following process to create fake splinters.


First, I added a layer of spirit gum to the skin, waiting a minute to let it get tacky. Then, I added the ‘splinter’ to the surface, which stuck to the spirit gum. I added some thick fake blood (specifically scar wax) to the wood, and then added another thin layer of spirit gum onto the wood and skin. Then, I applied a thin layer of tissue over the splinter to look like the skin (I pulled apart the layers of a normal tissue to make them thinner). I added makeup onto that layer of tissue, and then applied one more layer of spirit gum and tissue. Over the last layer of tissue, I added one more layer of spirit gum which I let dry fully, and then added a skin-toned loose setting powder over top. I blended the edges of the tissue into the skin using rubbing alcohol on a cotton swab. Then, I added more fake blood on top where it was sticking out of the skin, and dripping down.
So that’s…
-Layer of spirit gum
-Splinter wood
-Layer of blood
-Layer of spirit gum
-Layer of tissue
-Makeup
-Layer of spirit gum
-Layer of tissue
-Layer of spirit gum
-Powder
-Blend edges
-Fake blood
For some of the splinters, I had them going fully through the skin to poke out the other side, and for others I had them closed on one end. For the splinters on her face which were smaller, I did one fewer layers of tissue and spirit gum.
In addition to these examples, I worked on many of the props I sourced. For example, buying a working 1989 original Gameboy would’ve been too expensive, so I bought a replacement shell which I put together, inserted a fake screen, and temporarily glued in a real gameboy game. Many props I added paint or makeup to or otherwise modified in order to make them more realistic on camera. During filming, I had to stage the props to look realistic and sometimes to create movement in the shots.
Overall, the props, costumes, makeup, set dressing and overall design of Mirror Lake took a lot of time and experimentation (and no shortage of frustration). I had to keep reminding myself throughout the process that I was the one who wrote the scenes that had the most difficult props, so I really had only myself to blame for the frustration. But overall, I think that the work paid off and can be seen clearly on screen. I learned a lot throughout the process and am excited to take on similar projects in the future.